
sunwukong_DEX
10/14 07:44
How to Get Started with SunPerp
Accounts & Wallets
SunPerp — Wallet Connection Guide
This guide explains how to connect a wallet to SunPerp.
At a Glance
1) Open SunPerp(https://www.sunperp.com/futures/invite?invitecode=sqd22223) → 2) Click “Connect Wallet” → 3) Choose one of the supported wallets → 4) Sign the message → 5) You’re connected.
Prerequisites
- Install one of the supported wallets (exact four options listed in the connect dialog).
- Make sure the wallet extension/app is unlocked.
- You do not need gas to connect; network fees apply only when you later submit on-chain transactions.
1.Connect Your Wallet
Open the official SunPerp Link (https://www.sunperp.com/futures/invite?invitecode=sqd22223) and locate the “Connect Wallet” button in the top-right header.
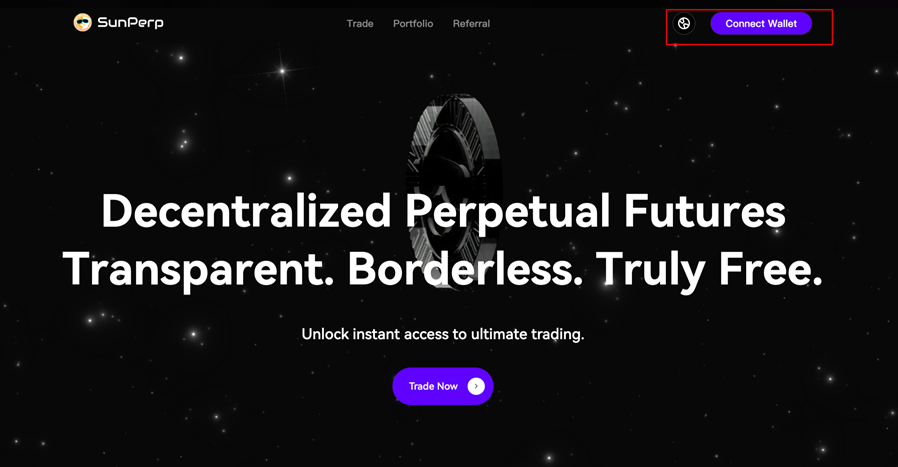
Click “Connect Wallet”. A modal appears with exactly four wallet options as implemented by SunPerp:
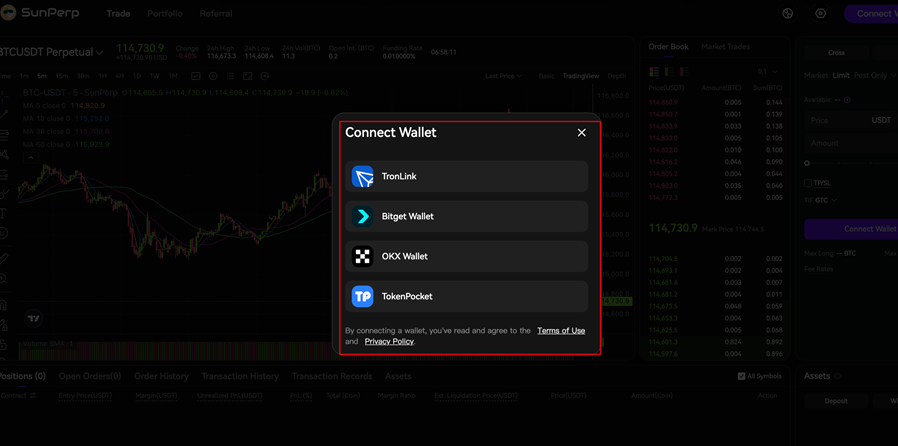
Select your wallet and follow the context-specific prompts:
• Browser Extension wallets (e.g., Tronlink):
- Ensure the extension is enabled in your browser.
- If prompted, approve the connection/authorization to SunPerp’s site.
- A sign-in message will appear; review and sign to complete the connection.
• Mobile/Bridge-style wallets (e.g., if one of these options is a QR-based connector):
- Click the option to display a QR code.
- Open the wallet app on your phone and scan the QR.
- Approve the connection in your mobile wallet, then sign the message.
After signing, your wallet address will appear in the header. SunPerp does not require chain selection at this step.
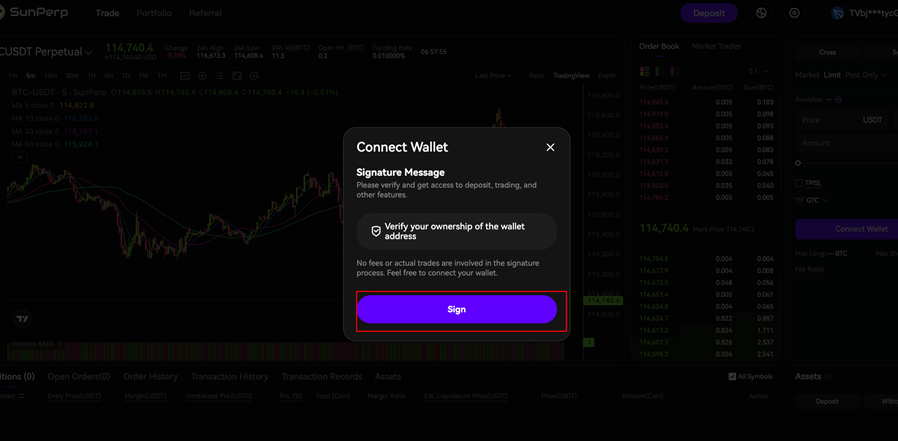
2.About the Sign-In Message
SunPerp requests a one-time signature to verify wallet ownership and establish a session. This signature does not grant spending permissions and does not incur gas fees. Always read the message and confirm the domain before signing.
Verify Connection & Switch Accounts
- Once connected, your address is displayed in the header.
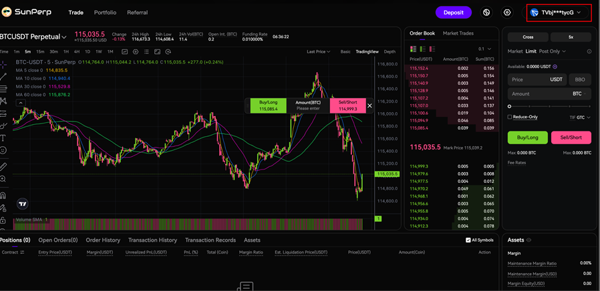
- To switch accounts, change the active account inside your wallet and click “Disconnect” → “Connect Wallet” again.
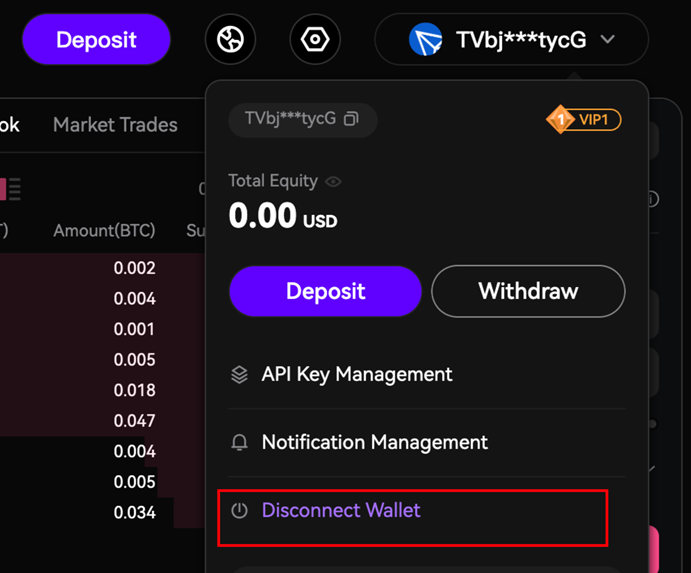
- If a signature prompt re-appears, sign again to refresh the session.
Troubleshooting
- Wallet not detected: Confirm the correct extension is installed and enabled. Close other wallet extensions that might conflict.
- Connect modal does not appear: Refresh the page and ensure pop-up blockers are disabled.
- Signature fails: Unlock your wallet, check system time, and try again. If the issue persists, disconnect and reconnect your wallet.
- Wrong account connected: Switch the active account in your wallet, then reconnect in SunPerp.
3.Guide to Deposits and Withdrawals
SunPerp — Deposit & Withdrawal Guide
This guide explains how to deposit and withdraw funds on SunPerp.
Deposit
Before you can start trading on SunPerp, you need to deposit supported tokens into the platform. Follow the steps below carefully to ensure a smooth process.
Step 1: Connect Your Wallet
1. Open the SunPerp app
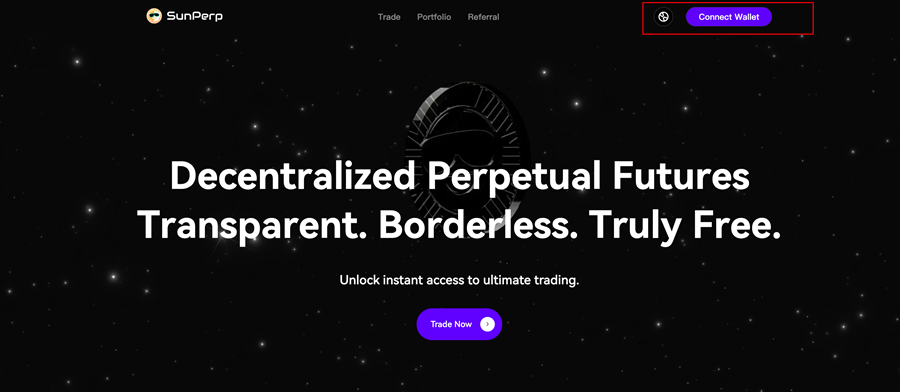
2. Select one of all supported wallets and complete the connection flow.
3. Once connected, your wallet address will be displayed in the header.
Step 2: Approve USDT (First-Time Only)
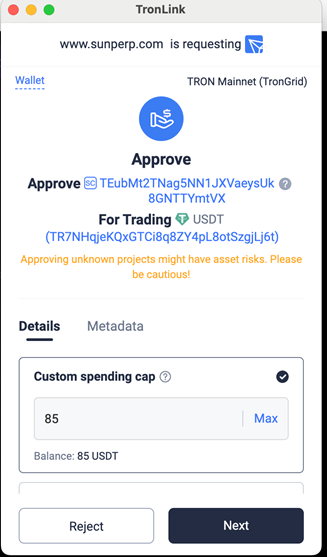
1. If this is your first deposit of USDT, you must approve the token for use on SunPerp.
2. In the [Deposit] modal, click [Approve USDT]. A transaction request will appear in your wallet.
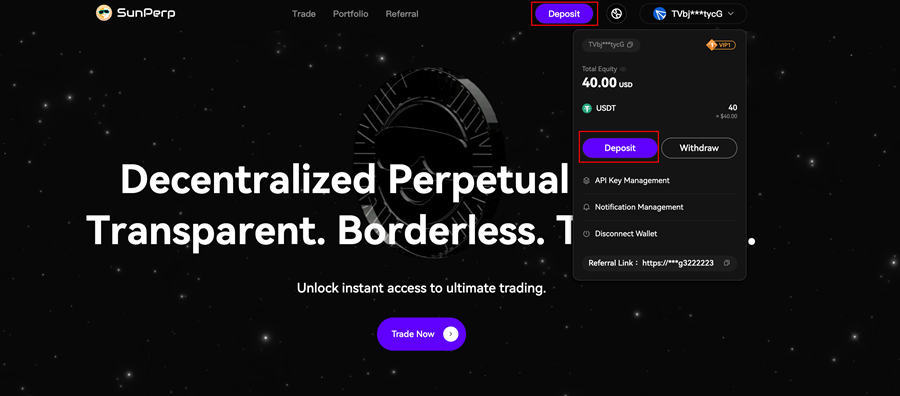
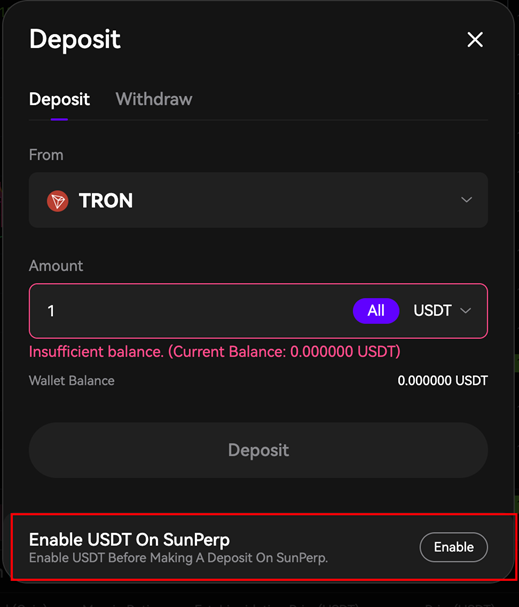
3. Carefully check the contract address before approving. The official SunPerp contract is: TEubMt2TNag5NN1JXVaeysUk8GNTTYmtVX
4. Confirm the approval transaction in your wallet.
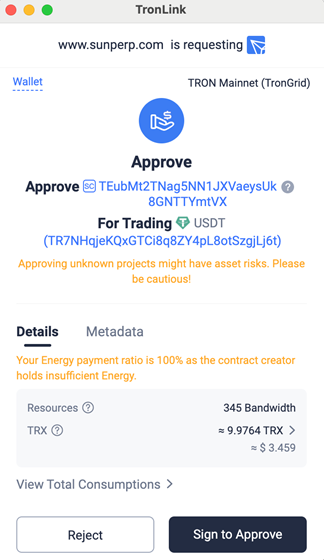
5. Wait until the approval transaction is confirmed on-chain. Once confirmed, you can proceed with deposits.
_Note: If you have already granted sufficient USDT allowance to this contract, this step will be skipped automatically.
Step 3: Deposit Funds
1. After approval, return to the [Deposit] modal.
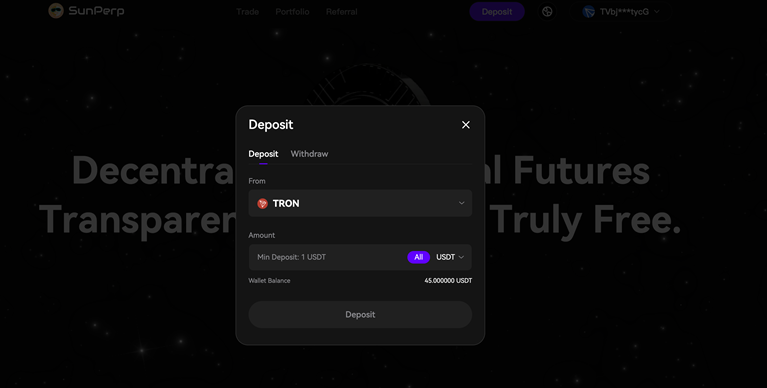
2. Select the token (e.g., USDT) and enter the deposit amount.
3. Click [Confirm Deposit]. A transaction request will appear in your wallet.
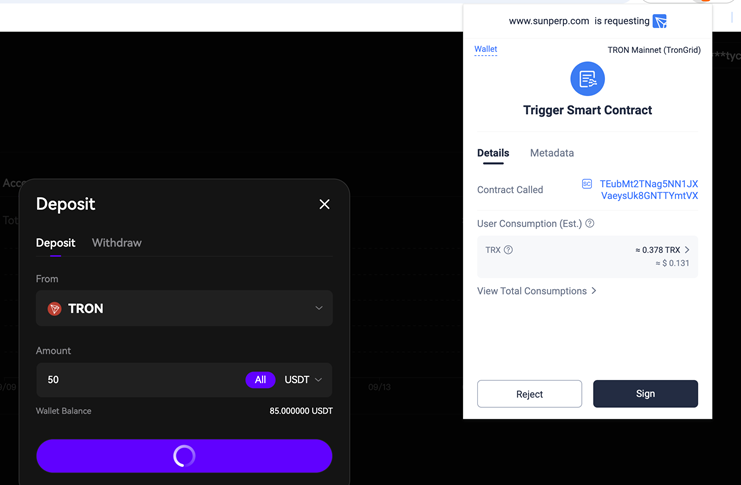
4. Review and sign the deposit transaction.
5. Wait for blockchain confirmation. Do not close or refresh the page during this step.
6. Once confirmed, your balance will be updated in the [Portfolio]
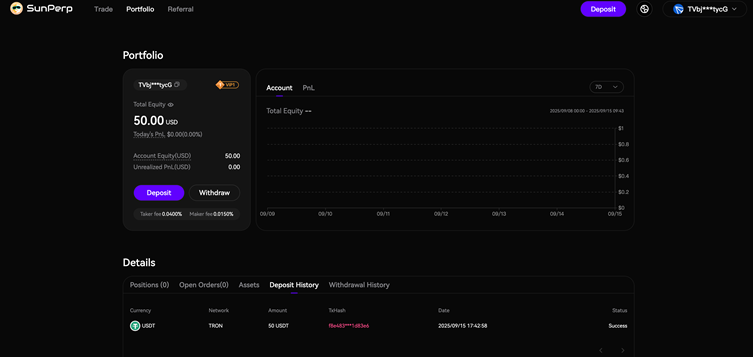
7. You can review completed deposits in the [Detail → Deposit History] section.
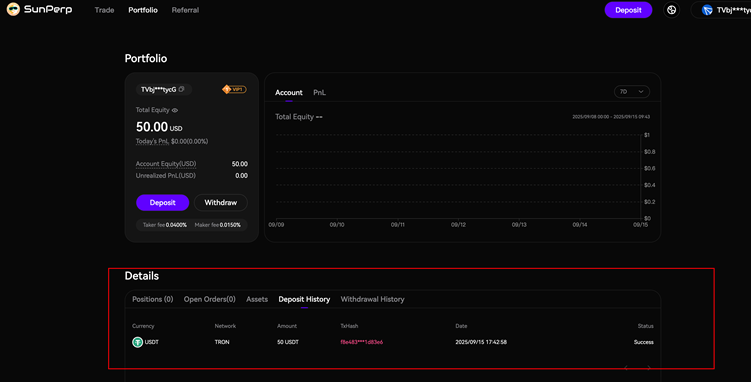
4.Important Notes for Deposits
- Ensure you have enough native tokens in your wallet (e.g., TRX on TRON) to cover network gas fees.
- Only approve the official contract address provided above. Approving unknown contracts may put your funds at risk.
- Deposits are irreversible once confirmed on-chain. Always double-check token and amount before approving.
Withdraw
Withdrawals allow you to transfer funds from SunPerp back to your connected wallet.
1. In the SunPerp (https://www.sunperp.com/futures/invite?invitecode=sqd22223)
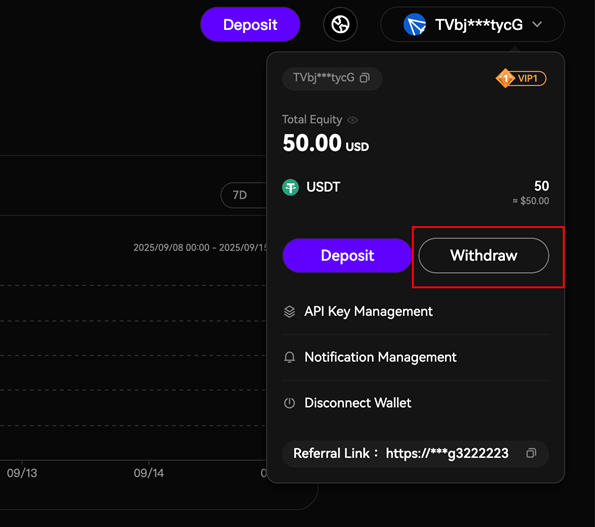
2. Select the token and amount you wish to withdraw.
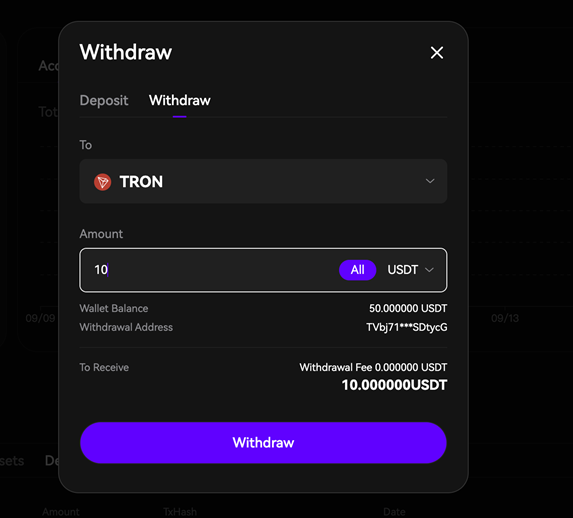
3. A transfer request will appear in your wallet. Review carefully and approve the transaction.
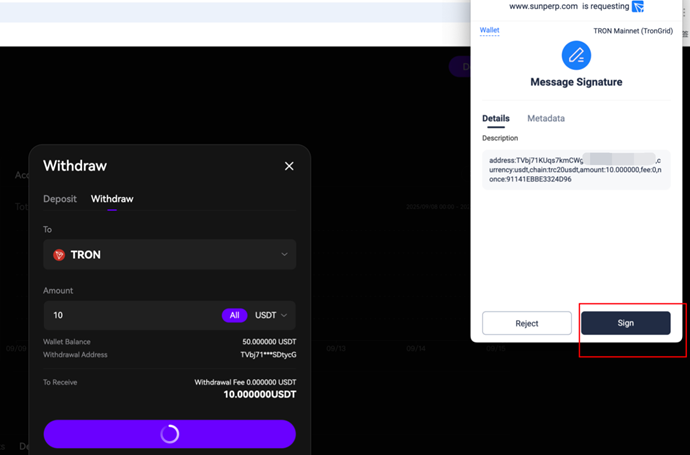
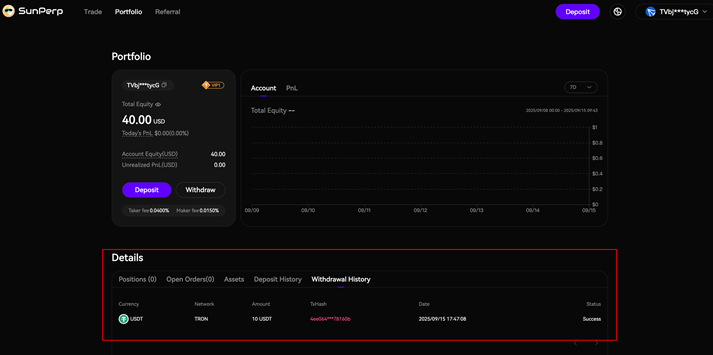
4. Wait for blockchain confirmation. The withdrawn amount will then appear in your wallet balance.
5. To review all past withdrawals, navigate to [Detail → Withdrawal History].
Important Notes for Withdrawals
- Withdrawal requests that remain unconfirmed due to network congestion may require additional time.
SunPerp Platform-wide Withdrawal Limit
SunPerp enforces a single global withdrawal limit across the entire platform:
- The maximum withdrawal amount for all users combined is capped at 2,000,000 USD per hour.
Troubleshooting
- Deposit not showing: Ensure your transaction has been confirmed on-chain. Refresh the page or check [Deposit History].
- Withdrawal delayed: Network congestion may extend confirmation times. Check blockchain explorer for status.
- Insufficient gas: Ensure your wallet has enough native tokens for gas fees.
- Wrong token sent: Depositing unsupported tokens may result in permanent loss.
All Comments0LatestHot